
Movavi Help Center: Selection Tool + Blade Tool
Two essentials for clean edits and fast rearranging
By the end you will be able to cut clips precisely with the Blade tool and reorder moments on the timeline with the Selection tool to build smooth action.
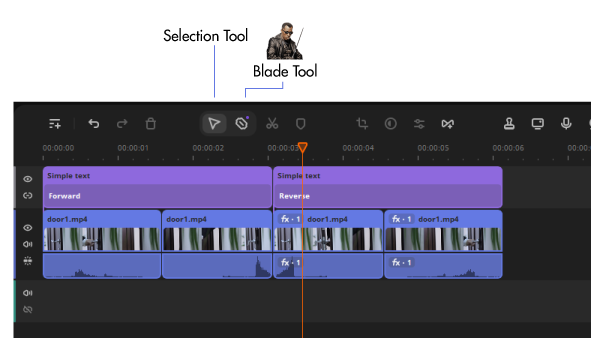
Blade Tool
Use the Blade tool to split a clip into parts. This lets you remove dead time, isolate impact moments, and time the action cleanly.
- Step 1 Move the playhead to the exact frame you want to cut. Use arrow keys for frame nudging if needed.
- Step 2 Activate the Blade tool from the toolbar, then click on the clip at the playhead line to split.
- Step 3 Repeat at the end of the moment you want to keep. Delete or mute the unwanted middle or outer parts.
Shortcut: Split clip is Cmd + B on Mac and Ctrl + B on Windows.
Mini practice: Cut just before a sword impact, then again just after. Delete the middle to create a tighter hit. Play back and check that motion feels natural.
Selection Tool
Use the Selection tool to grab clips or segments and move them on the timeline. Build rhythm by placing strong actions back to back.
- Step 1 Click the Selection tool (arrow icon) on the toolbar.
- Step 2 Click a clip or segment to highlight it. Drag left or right to reposition. Watch the snap guides to align on cuts or music beats.
- Step 3 Trim by hovering the start or end edge until the trim handle appears, then drag to shorten or extend.
Tip: If a clip will not move, check for track locks or linked audio. Unlock the track or unlink audio before rearranging.
Mini practice: After cutting two strikes, drag the stronger strike earlier. Trim the incoming edge to land exactly on the previous motion peak.
Flow check
- Action feels continuous across cuts
- No accidental gaps or black frames
- Impacts and reactions are clear and readable
Need more shortcuts later? Open the in-app Help menu and look for Keyboard shortcuts. Some shortcuts can vary by version.
Movavi Help Center: Adding Audio
Import, place, sync, and mix sound effects and music
Goal: add SFX and music, balance volumes, create fades, and duck music under key moments. Export with clear levels and no clipping.
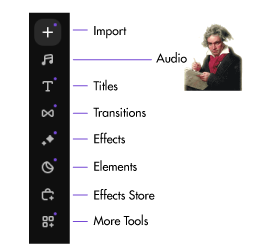
1) Import audio
- Open your project. In the Media bin, click Import then choose WAV, MP3, or AAC files.
- Drag audio from the bin to an Audio Track below the video track.
- Create extra audio tracks if needed. Right click in the track header area and add track.
Tip: Use separate tracks for SFX, dialogue, and music. It makes mixing faster.
2) Place and sync
- Position the playhead on the visual event. Use frame keys to nudge for precision.
- Drop the SFX so its peak aligns with the moment on screen. Trim if needed using the edge handles.
- Split long audio around important hits so you can fine tune each piece.
Shortcuts: Split Cmd+B (Mac) or Ctrl+B (Windows). Next frame Cmd/Ctrl + →. Previous frame Cmd/Ctrl + ←.
3) Set levels
- Select a clip and adjust the Volume slider in the inspector.
- Aim for peaks around the yellow range on the meters. Avoid constant red which means clipping.
- Use the track header mute and solo buttons to check parts quickly.
4) Fade in and fade out
- Select the audio clip. In the inspector, set Fade In and Fade Out duration.
- For music, try a 0.5 to 1.5 second fade in. For SFX, keep fades short so the transient stays sharp.
5) Duck music under action or dialogue
- Select the music clip. Add keyframes on the volume line at the start and end of the moment.
- Lower the middle keyframes by 6 to 12 dB so SFX or dialogue sits on top.
- Add short ramps into and out of the dip to avoid bumps.
Tip: Use more than two keyframes for a smoother curve. Keep music audible but secondary.
6) Clean unwanted noise
- Select the audio clip. Open Audio Effects or Enhance then try Noise Removal and Equalizer.
- Use light settings first. Too much processing can make audio sound hollow.
7) Export with good levels
- Format MP4 (H.264), audio AAC, 192 to 256 kbps.
- Play a loud section before export. If meters hit red, lower the track or the master level slightly.
- Export and review the file in a media player with normal volume.
Quick checklist
- Separate tracks for SFX, dialogue, and music
- Peaks in yellow, not red
- Fades on music starts and ends
- Ducking under important moments
- No clicks or gaps between clips
Need shortcuts fast? Split Cmd/Ctrl + B. Next frame Cmd/Ctrl + →. Previous frame Cmd/Ctrl + ←.
Movavi Help Center: Adding Effects
Transitions, filters, overlays, color correction & more
Goal: add visual effects, filters, transitions, overlays, and color adjustments to polish your video and give it cinematic flair.
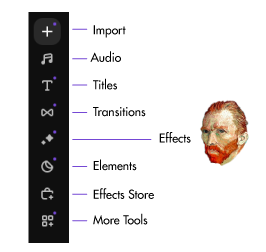
1) Open the Effects Panel
Click the **Effects** icon in the vertical toolbar to open the Effects panel. Here you’ll find categories like filters, color correction, overlays, transitions, and more.
Tip: If you can't see the Effects panel, make sure your timeline is active or no item is in “preview only” mode.
2) Apply a Filter or Visual Effect
- Browse effect categories (e.g. **Color**, **Stylize**, **Distort**) and hover to preview the effect on your video.
- Drag an effect from the panel directly onto a video clip on the timeline—or right-click → **Apply to clip**.
- After applying, open its settings panel (in the inspector) to fine-tune effect strength, blend mode, and other parameters.
Warning: stacking too many GPU-heavy effects can slow playback. Use proxies or lower resolution preview if needed.
3) Add Transitions Between Clips
- In the Effects panel, switch to **Transitions** category.
- Drag a transition onto the cut point between two clips. The transition will blend them over its default length.
- Click the transition on the timeline to open settings and adjust duration or alignment (start on clip A, overlap equally, etc.).
4) Add Overlays, Titles & Graphics
- Find **Overlay** or **Titles** in the Effects panel (or use the separate Text / Overlays toolbar section).
- Drag graphic or lower-third element to a track above your video.
- Adjust size, opacity, position, and blend mode in the inspector to integrate the overlay.
5) Color Correction & Grading
- Open **Color** category in the Effects panel.
- Drag **Brightness/Contrast**, **Color Balance**, **LUTs**, or **Curves** to the clip.
- In the inspector, adjust sliders or load LUT presets for stylized looks. Use scopes like zebras or waveform to guide exposure.
Tip: Apply same LUT or style to all clips for consistency. Use "Copy Effects" and "Paste Effects" between clips to speed workflow.
6) Animate effect parameters with Keyframes
- In the effect inspector, enable **keyframes** mode for parameters like opacity, position, strength, etc.
- Move playhead, change the value — a keyframe appears automatically (or click the “+” icon).
- Add multiple keyframes to make smooth transitions or effect ramps over time.
7) Preview, tweak, and optimize
- Use **Play Preview** to test effects in motion. Watch for stutters or artifacts.
- Disable or reduce intensity of heavy effects if playback lags.
- Use proxy mode or lower preview resolution while editing.
Quick checklist
- Apply effects sparingly and purposefully
- Use transitions to smooth cuts but not distract
- Match color and style across clips
- Animate parameters when needed with keyframes
- Check playback to catch glitches early
Remember: always preview your final renders. Some effects may look different when exported vs. live preview.